
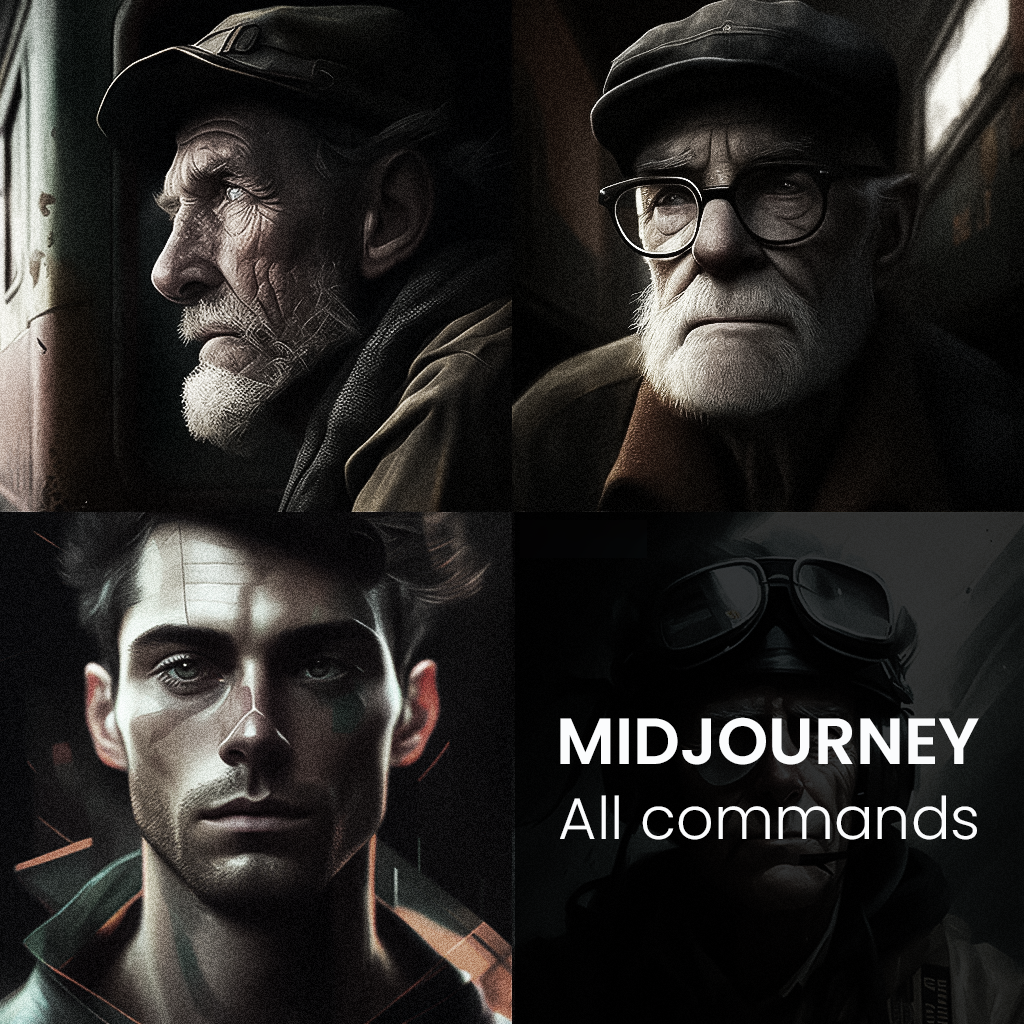
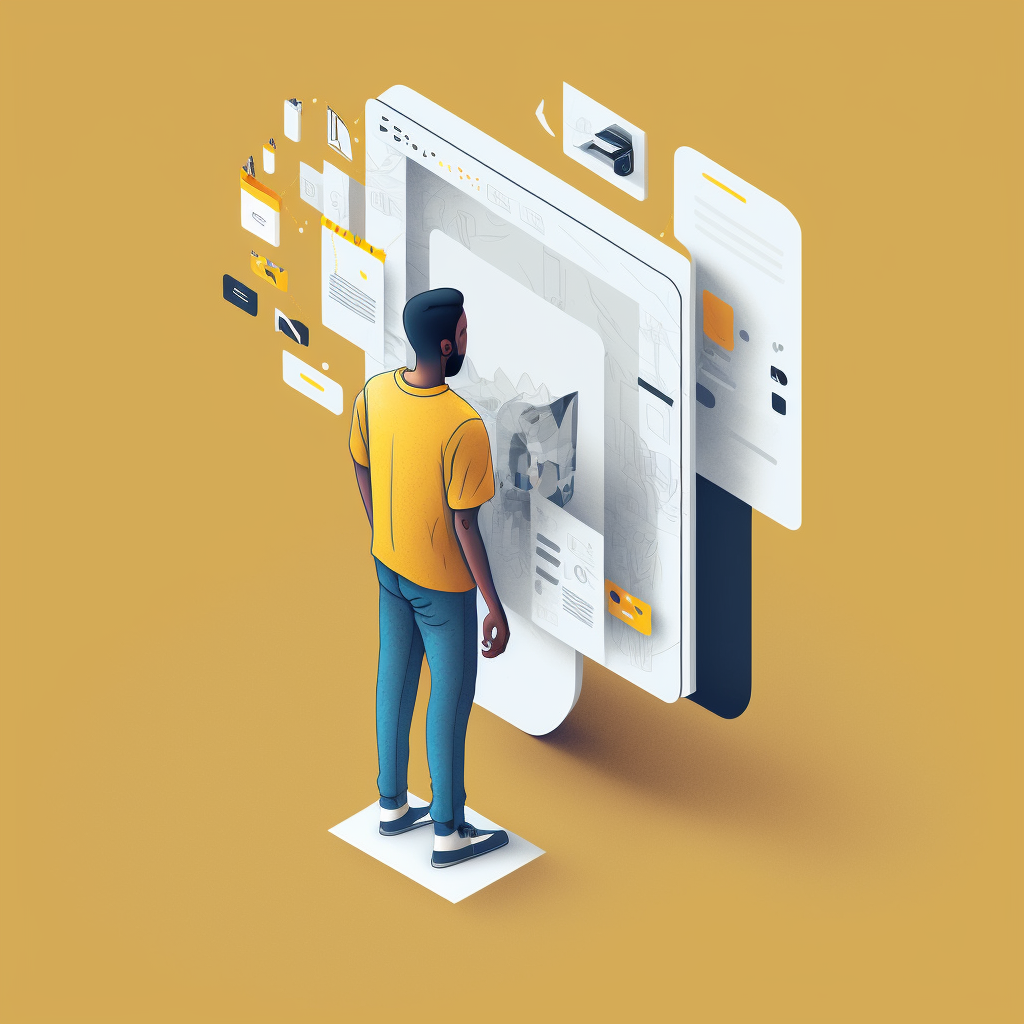
Midjourney commands & prompts
Agile & UI Design
MidJourney provides a user-friendly interface that makes it easy to generate images, even for people with no prior experience in graphic design or image creation. Input your textual description, and the platform does the rest, generating a high-quality image that matches your specifications. The images generated by MidJourney are customisable and can be fine-tuned to achieve the desired look and feel. In addition, users can specify the size, resolution, and format of the output image, making it suitable for a wide range of applications, from web graphics to print materials. One of the key advantages of using Midjourney is the speed and efficiency of the image generation process. With its advanced AI algorithms, the platform can generate an image in just a few seconds, saving users time and resources compared to traditional image creation methods.
In addition to its user-friendly interface, Midjourney also provides a REST API that developers can use to integrate the platform into their applications and systems. This opens up many possibilities for automating image generation tasks and incorporating them into workflows and processes.
Overall, Midjourney is a powerful tool for anyone who can generate high-quality images from textual descriptions quickly and easily. Whether you're a graphic designer, marketer, or developer, MidJourney can help you create visually appealing and functional images, making it a valuable addition to your toolkit.
Text prompts:
MidJourney uses a set of text-based prompts to generate images. These prompts provide a structure for describing the elements of an image, such as the objects, background, colours, and actions, as well as the emotions and poses of the objects.
Here is a list of some common text prompts used in MidJourney:
Object: Specifies the main object in the image, such as a person, animal, or vehicle.
Background: Specify the background of the image, such as a landscape, room, or sky.
Colour: Specifies the colours of the object or background.
Pose: Specifies the position and posture of the object.
Size: Specifies the size of the object relative to the background.
Light: Specifies the lighting conditions in the image, such as day or night, bright or dim, etc.
Action: Specifies an action being performed by the object.
Emotion: Specifies the emotional state of the object.
Angle: Specifies the viewpoint of the image, such as a bird's eye view or worm's eye view.
Focus: Specifies what part of the image is in focus, such as the foreground, background, or specific object.
Using these text prompts, you can provide a detailed description of the image you want to generate, and Midjourney will use its AI algorithms to create an image that matches your specifications. By adjusting these parameters, you can control various aspects of the image, such as the size, position, appearance of objects, background, and lighting conditions. You can also specify the output image's desired resolution, format, and aspect ratio.
Using these parameters, you can create images tailored to your specific needs and preferences, making Midjourney a versatile and flexible platform for generating high-quality images from textual descriptions.
Certainly! Here's an example of how you might use the parameters in Midjourney to generate an image:
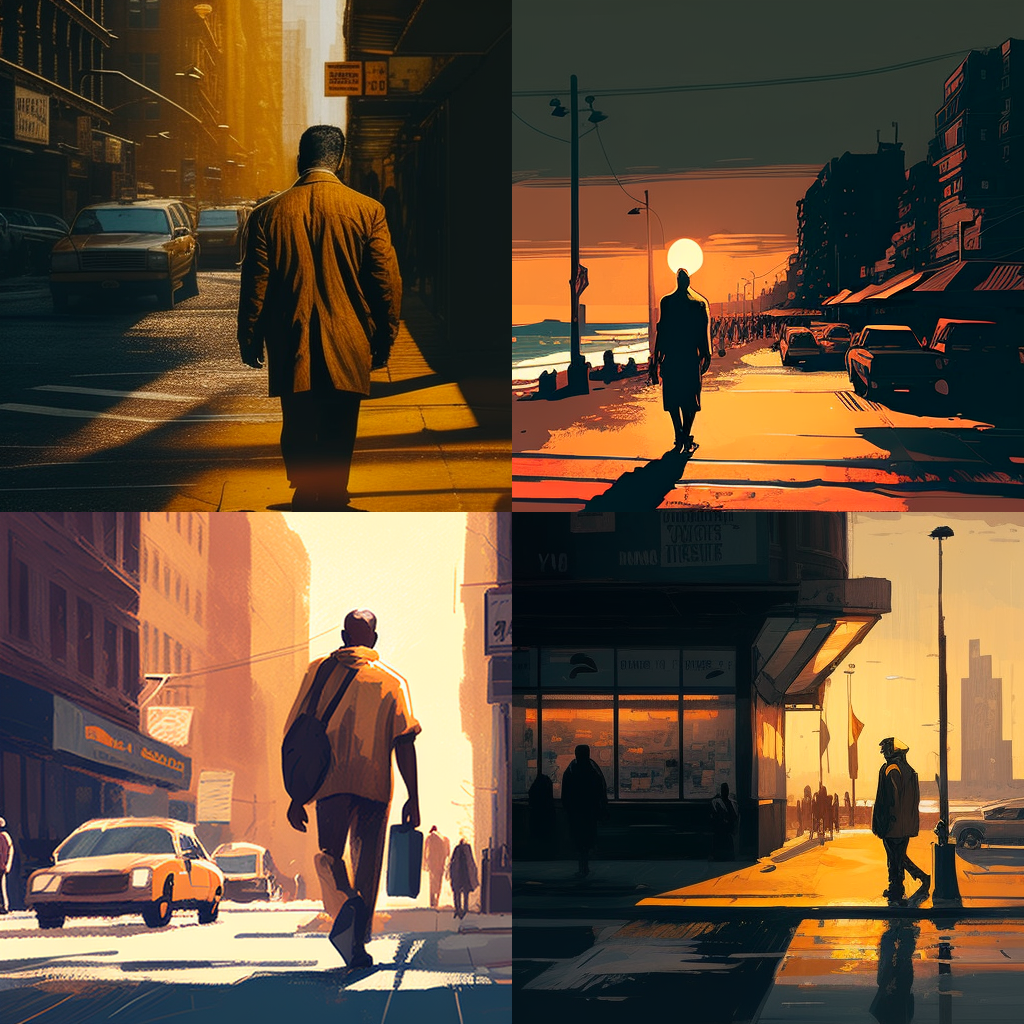
Suppose you want to generate an image of a person sitting at a desk, typing on a computer. You could provide the following textual description to MidJourney:
"Object: person Background: office Color: blue Pose: sitting Size: normal Light: bright Action: typing Emotion: focused Angle: front Focus: person."

MidJourney will use this description and AI algorithms to generate an image matching your specifications. The person in the image will be depicted sitting at a desk in an office, with the background coloured blue. The person will be depicted as normal size, sitting and typing on a computer, with a focused expression and bright lighting. Another example is
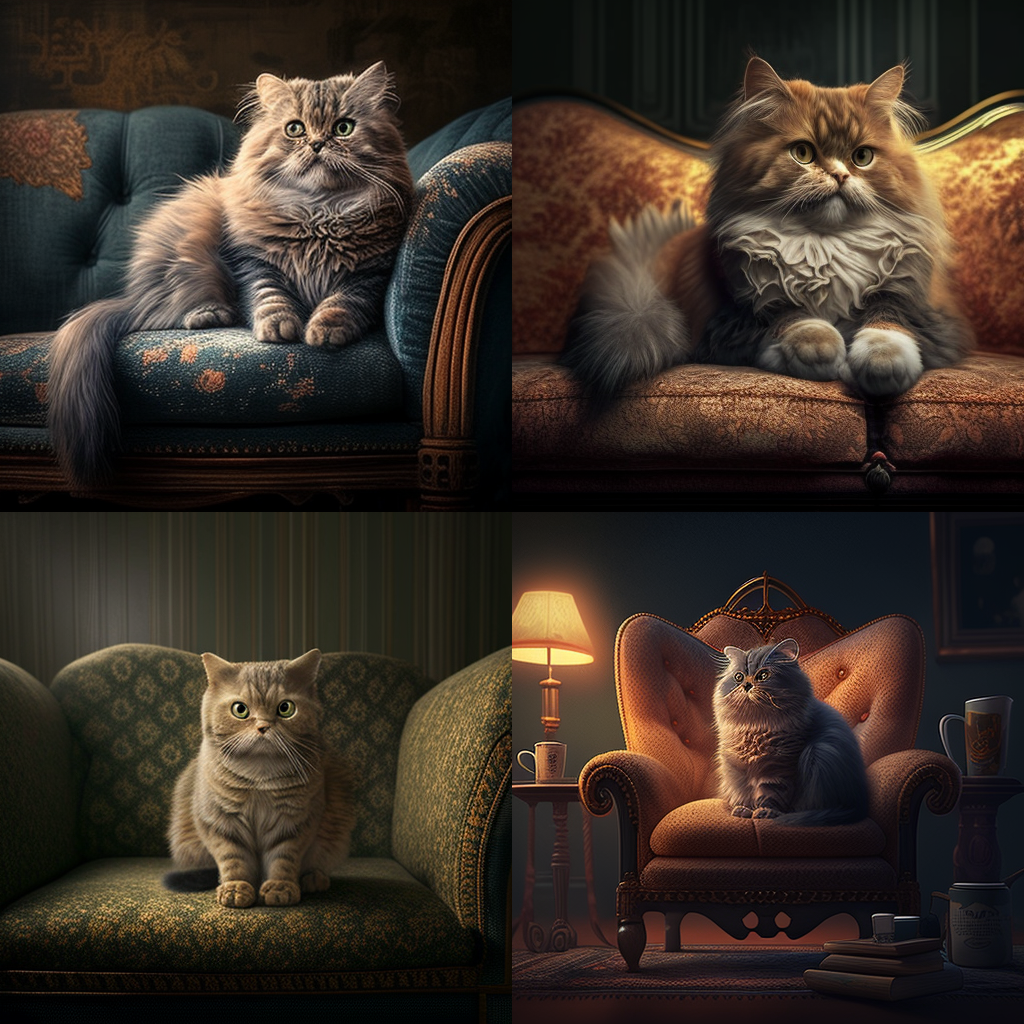
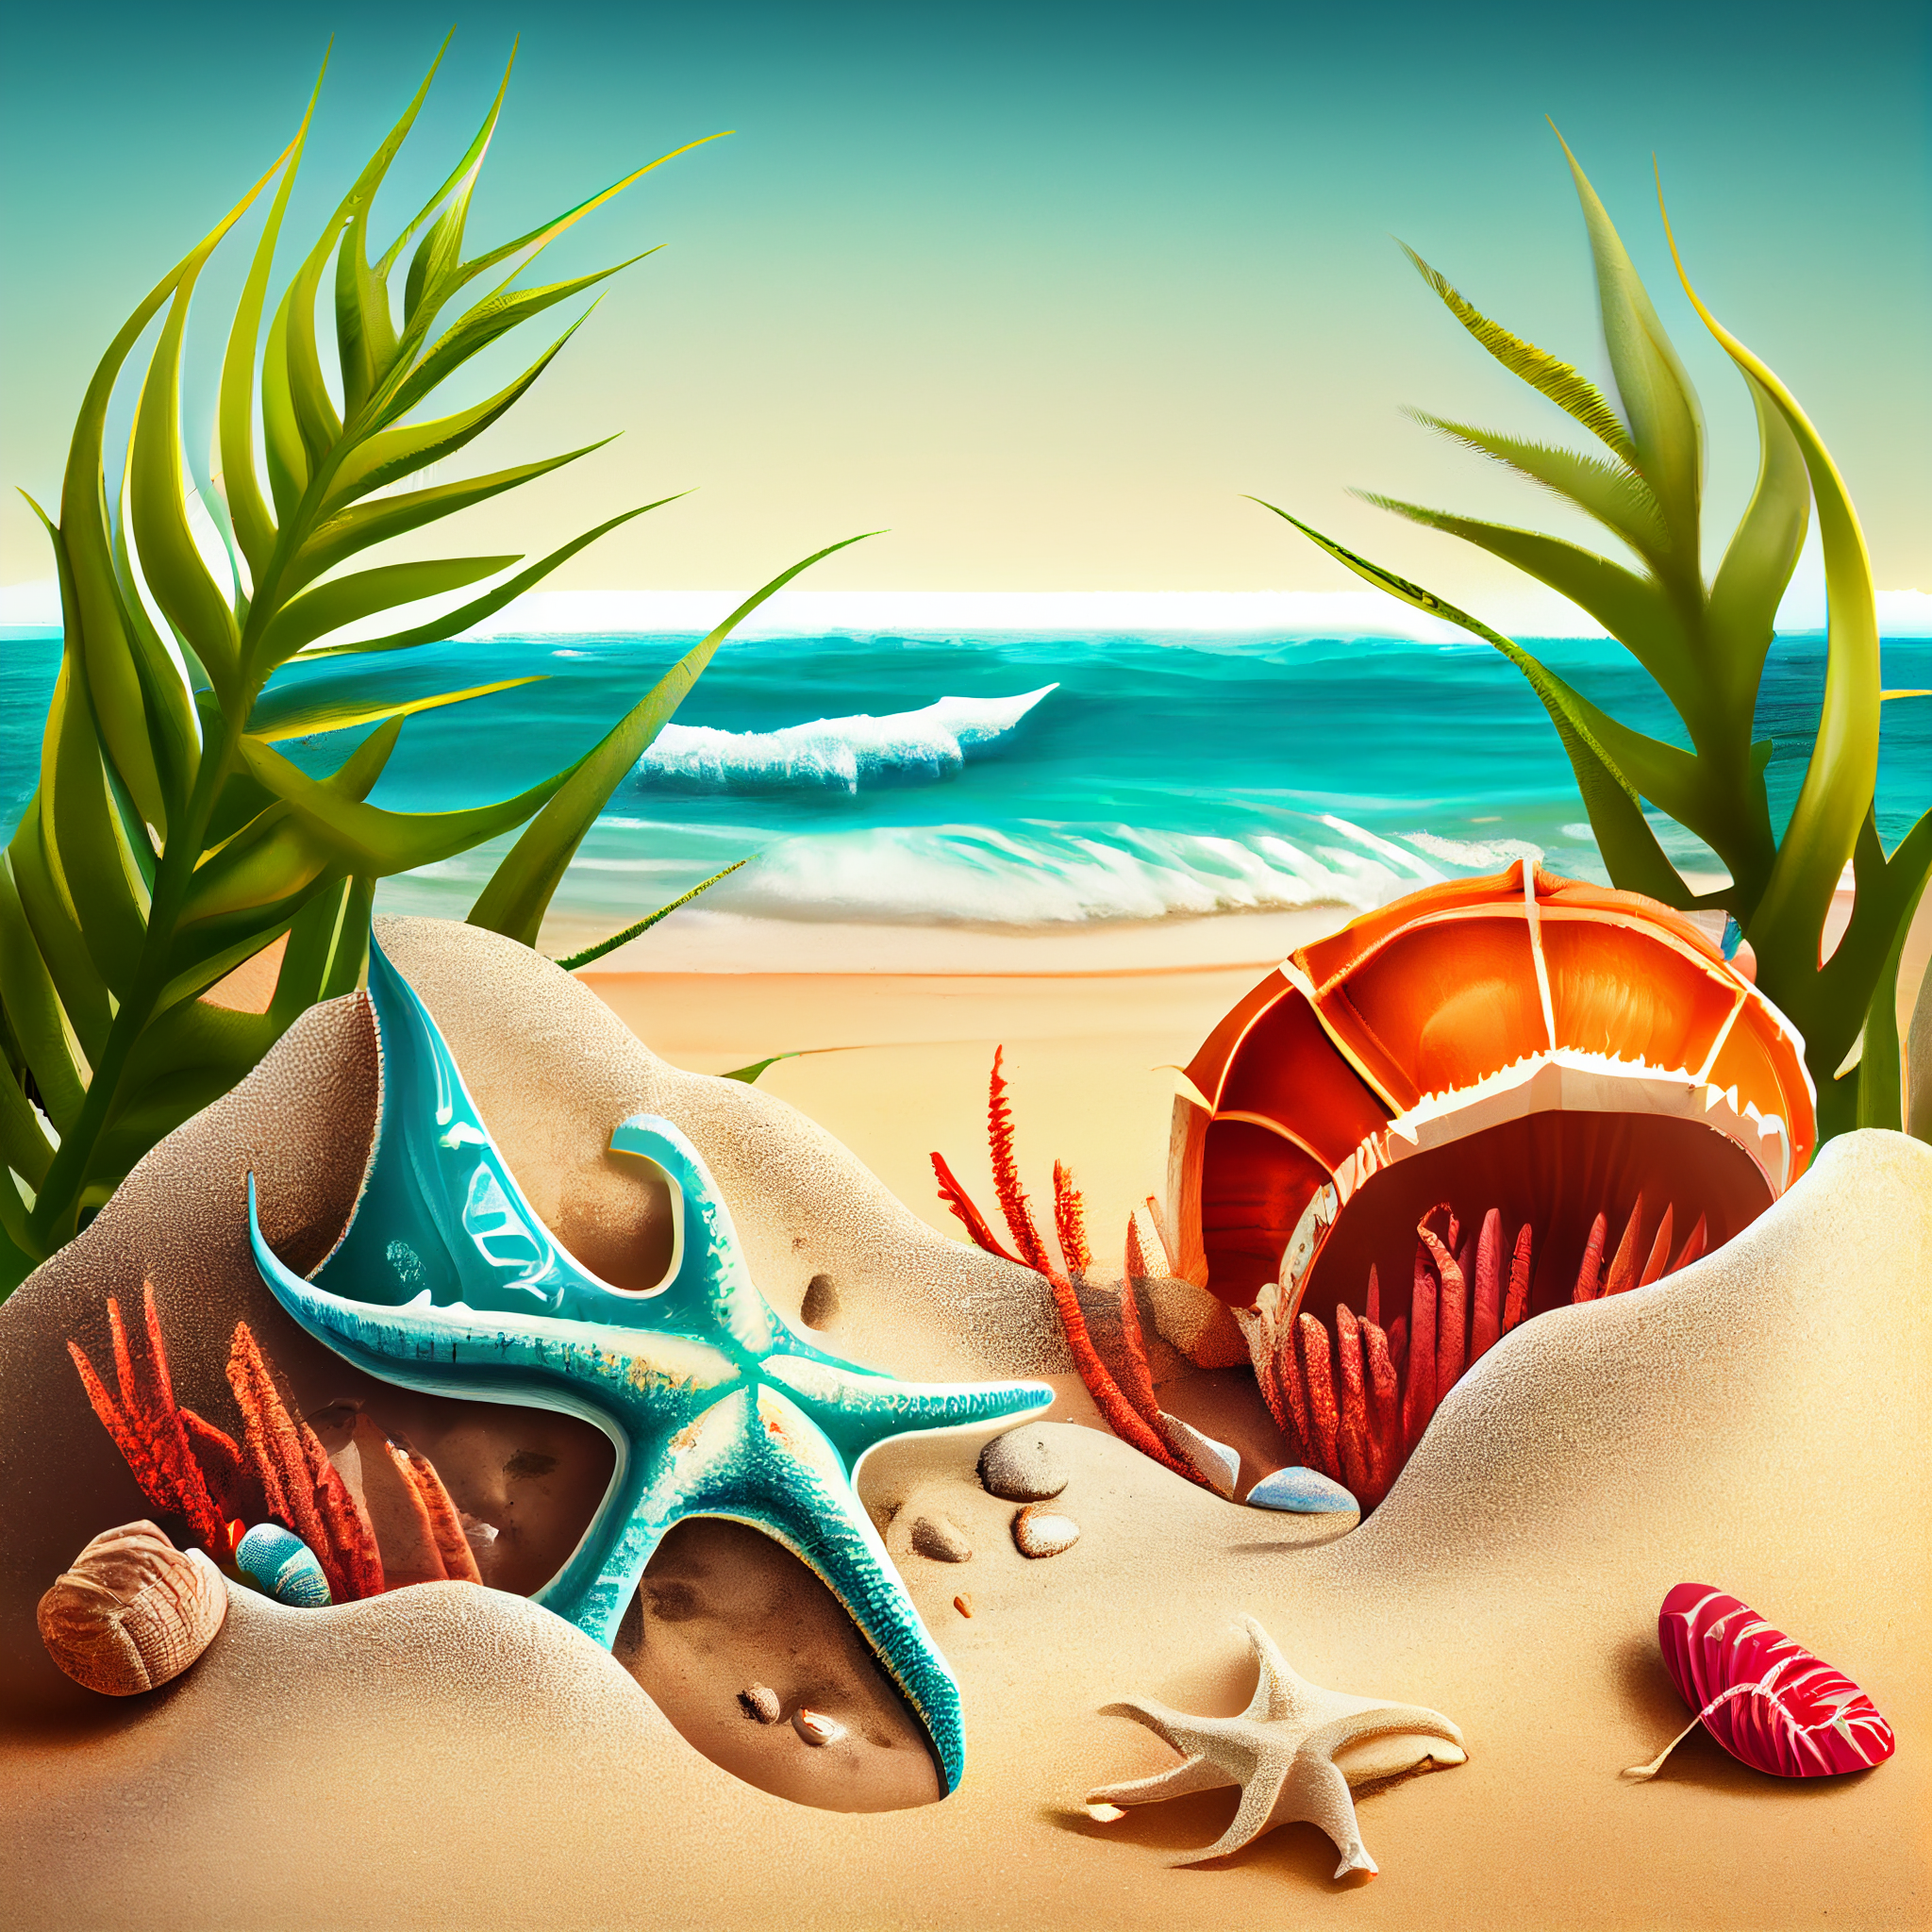
"Object: Cat Background: A grassy field Colour: Orange Pose: Sitting on a branch Size: Small Light: bright sunlight Action: playing with a ball Emotion: happy.
The Midjourney platform will generate four images of a small orange cat using the above example. Here is the result.

Parameter List
The parameter list provided describes the different options available for configuring image generation using the Midjourney algorithm. Parameters can be used to modify aspects of the image, such as the aspect ratio or rendering quality, and also to specify which model version or upscale to use.
Here is a summary of the different parameters and their functions:
Basic Parameters
--aspect ratio or --ar: Change the aspect ratio of the generation.
--chaos <number 0–100>: Change how varied the results will be.
--no: Negative prompting removes certain elements from the image.
--quality <.25, .5, 1, or 2>, or --q <.25, .5, 1, or 2>: Control how much rendering quality time is spent on the generation.
--seed <integer between 0–4294967295>: Specify the seed number to create a field of visual noise to generate the initial image grids.
--stop <integer between 10–100>: Finish a job partway through the process.
--style <4a, 4b, or 4c>: Switch between different versions of the Midjourney Model Version 4.
--stylize <number>, or --s <number>: Control how strongly Midjourney's default aesthetic style is applied to jobs.
--uplight: Use an alternative "light" upscale when selecting the U buttons.
--upbeat: Use an alternative beta upscale when selecting the U buttons.
Model Version Parameters
--niji: Use an alternative model focused on anime-style images.
--hd: Use an early alternative model that produces larger, less consistent images. Suitable for abstract and landscape images.
--test: Use the Midjourney special test model.
--testp: Use the Midjourney special photography-focused test model.
--version <1, 2, or 3>, or --v <1, 2, or 3>: Use an earlier version of the Midjourney algorithm.
Upscaler Parameters
--uplight: When selecting the U buttons, use an alternative "light" upscale.
--upbeta: When selecting the U buttons, use an alternative beta upscaler.
--upanime: Use an alternative upscaler trained to work with the --niji Midjourney Model.
Other Parameters
--creative: Modify the test and testp models to be more varied and creative.
--iw: Sets image prompt weight relative to text weight.
--sameseed: Create a single large random noise field applied across all images in the initial grid.
--video: Saves a progress video of the generated initial image grid.
Aspect Ratio & Sizes
(--aspect or --ar)
Aspect Ratio allows you to set the dimensions of the image In Midjourney, and you can specify the aspect ratio and size of the generated images. The aspect ratio determines the proportion of width to height in the image and can be specified as either a standard aspect ratio (e.g., 4:3, 16:9) or a custom ratio. The size of the image can be specified in pixels or as one of several standard sizes (e.g., small, medium, large).
By specifying the aspect ratio and size, you have control over the final dimensions of the image, allowing you to generate images that match your desired specifications. For example, you could specify a custom aspect ratio of 5:4 and a size of 2048x1024 pixels to create an image that is 2048 pixels wide and 1024 pixels tall with a 5:4 aspect ratio.
Note that the availability of specific aspect ratios and sizes may vary depending on the configuration of your Midjourney instance, and new options may be added or existing options updated in future releases of the software. The aspect ratio and size options in Midjourney allow you to fine-tune the appearance and format of the generated images to suit your specific needs.
Examples:
Here are some examples of how you can use the aspect ratio and size options in Midjourney:
Example 1: a [girl] [sceared] in the middle of the jungle --ar 16:9
Aspect Ratio: 16:9
Size: 1920x1080 pixels
This example generates an image with a 16:9 aspect ratio and a size of 1920 pixels wide and 1080 pixels tall.

Example 2: a [girl] [sceared] in the middle of the jungle --ar 4:3
Aspect Ratio: 4:3
Size: Large
This example generates an image with a 4:3 aspect ratio and a large size. The image's exact dimensions depend on your MidJourney instance's specific configuration.

Aspect ratios are an important consideration in digital design because they affect the overall look and feel of the design and how it is displayed on different devices and platforms. Here are some additional details about the aspect ratios I mentioned earlier:
Square (1:1) - This aspect ratio is often used for social media posts and profile pictures because it is versatile and can be easily displayed on various devices and platforms.
Standard (4:3) - This aspect ratio was commonly used for old CRT monitors and digital cameras. It is not as common in modern digital design, but it is still sometimes used for certain applications, such as presentation slides.
Classic (3:2) - This aspect ratio is the classic aspect ratio for 35mm film and some digital cameras. It can give a more traditional or nostalgic look to digital designs.
Widescreen (16:9) - This aspect ratio is the most common aspect ratio for modern computer monitors, laptops, and HDTVs. It is great for displaying video content and can give digital designs a modern and cinematic look.
Portrait Mode (9:16) - This aspect ratio is used for social media stories and vertical videos. It is great for displaying mobile content and can give a more intimate and personal look to digital designs.
Vertical (4:5) - This aspect ratio is commonly used for Instagram posts. It is a great option for displaying mobile content, and it can give a clean and polished look to digital designs.
2:1 - This wide aspect ratio is commonly used for panoramic photos, website banners, and social media headers. It can give a sweeping, dramatic effect to digital designs.
16:10 - This aspect ratio is a common alternative to 16:9, especially for computer monitors. It can give a slightly taller display area and is good for displaying more content vertically.
5:3 - This aspect ratio is a slightly wider alternative to 3:2 and is used in some digital cameras and monitors. It can give a more modern and edgy look to digital designs.
These are just a few more examples of aspect ratios used in digital design. The choice of aspect ratio depends on the project's specific needs, the medium of display, and the overall look and feel that the designer wants to achieve.
These are just a few examples of how you can use the aspect ratio and size options in MidJourney to generate images that match your desired specifications. Of course, the options available to you may vary depending on the configuration of your MidJourney instance. Still, the basic process is the same: specify the desired aspect ratio and size in your textual description, and MidJourney's AI algorithms will generate an image that matches your specifications.

--chaos
The --chaosa parameter in Midjourney is used to control the degree of randomness or variation in the generated images. The parameter takes a number between 0 and 100, where 0 produces more predictable and consistent results and 100 produces more unusual and unexpected results.
For example, if you use a —-chaos value of 0, Midjourney will tend to generate images that are more similar to the input prompt or previous generations, with less variation between individual images. On the other hand, a —-chaos value of 100 will produce more abstract and surreal images that deviate further from the prompt.
Here are some examples of how the —-chaos parameter can affect image generation:
—-chaos 0: Midjourney produces more predictable results that are similar to the input prompt or previous generations. For example, if the prompt is "a cat sitting on a couch", the generated images might show cats in various poses on different types of couches.
—-chaos
50: Midjourney produces more varied results that still retain some connection to the input prompt. For example, if the prompt is "a cat sitting on a couch", the generated images might show cats in unexpected poses on unusual or surreal couches.
—-chaos
100: Midjourney produces highly abstract and surreal results that are far removed from the input prompt. For example, if the prompt is "a cat sitting on a couch", the generated images might show cats merged with couches or floating in space with surreal backgrounds.
It's important to note that the actual results can vary depending on other parameters used in conjunction with —-chaos such as the chosen model version, upscale, aspect ratio, and quality settings.
--quality
compatible with version 1, 2, and 3 only
The --quality parameter in Midjourney is used to control the amount of time spent on rendering and refining the generated images. The parameter takes a value of either 0.25, 0.5, 1, or 2, with higher values resulting in higher rendering quality but longer generation times.
Here are some examples of how the --quality parameter affects image generation:
--quality
0.25: Midjourney spends less time on rendering and generates images quickly, but the quality of the images may be lower with visible artifacts, noise, or blurring. This option is useful for quick previews or generating a large number of images with minimal processing time.--quality
0.5: Midjourney spends more time on rendering and generates images with moderate quality, with fewer artifacts and noise but still some visible blurring. This option strikes a balance between generation time and quality.--quality
1: Midjourney spends even more time on rendering and generates high-quality images with minimal visible artifacts or noise. This option is suitable for generating high-quality images with fine details or textures.
It's important to note that the actual results can vary depending on other parameters used in conjunction with --quality, such as the chosen model version, upscaler, aspect ratio, and chaos settings. Additionally, higher values of --quality may cost more to run and may require more processing power.
Regenerate response
Advanced Text Weight
In MidJourney, the "Advanced Text Weight" option allows you to specify the weight (or emphasis) that should be given to certain words or phrases in your textual description. This option gives you greater control over the content and style of the generated images, allowing you to highlight specific aspects of your scene and shape the overall tone of the image.
For example, you could use the Advanced Text Weight option to emphasise certain objects in the scene, such as a particular person or building. By giving these objects more weight in the textual description, MidJourney's AI algorithms will generate an image that emphasises these objects more prominent in the final image.
To use the Advanced Text Weight option in MidJourney, you can add square brackets around the word or phrase you want to emphasise, with a number inside the brackets that specify the weight. The higher the number, the greater the emphasis that will be given to the word or phrase.
For example:
"A [3]large elephant [1] stands in a [2] lush green field."
In this example, the word "large elephant" has a weight of 3, meaning it will be emphasised more in the image. The word "lush green field" has a weight of 2, meaning it will be given less emphasis than the elephant but more emphasis than the other words in the description.

Note that the Advanced Text Weight option's specific syntax and functionality may vary depending on your Midiourney instance's configuration, and new options may be added or existing options updated in future software releases. The Advanced Text Weight option in MidJourney provides a powerful way to control the content and style of the images you generate, allowing you to create images that match your desired vision.
Here are a few more examples of how you can use the Advanced Text Weight option in MidJourney:
Example 1: "A [2]man walks down a [3]busy street in [1]New York City"

In this example, the word "New York City" has the highest weight, meaning it will be given the most emphasis in the image. The word "busy street" has a weight of 3, and the word "man" has a weight of 2.
Example 2: "A [3]gorgeous sunset [2]illuminates a [1]beach in Miami"

In this example, the word "beach in Miami" has the highest weight, meaning it will be given the most emphasis in the image. The word "gorgeous sunset" has a weight of 3, and "illuminates" weighs 2.
Example 3: "A [2]cat [1]sits on a [3]windowsill overlooking a [4]cityscape"

In this example, the word "cityscape" has the highest weight, meaning it will be given the most emphasis in the image. Likewise, the word "windowsill" has a weight of 3, the word "cat" has a weight of 2, and the word "sits" has a weight of 1.
These are just a few examples of how you can use the Advanced Text Weight option in MidJourney to control the emphasis and content of the generated images. By specifying the weight of different words and phrases in your textual description, you can fine-tune the appearance of the generated images to match your desired vision.
Algorithm Modifiers
In Midjourney, algorithm modifiers are additional parameters you can use to customise the behaviour of the AI algorithms that generate images from textual descriptions. These modifiers can fine-tune the generated images' style, content, and overall look.
Some examples of algorithm modifiers that are available in MidJourney include:
Style: The style modifier can be used to generate images in a particular style, such as impressionist, surreal, or minimalist.
Colour: The colour modifier can generate images in a specific colour palette, such as warm or cool colours.
Texture: The texture modifier can generate images with a particular texture, such as wood grain or marble.
Lighting: The lighting modifier can generate images with a specific type of lighting, such as natural or artificial light.
Background: The background modifier can generate images with a specific type of background, such as a cityscape or a beach.
Emotion: The emotion modifier can be used to generate images that convey a particular emotion, such as happiness, sadness, or anger.
Composition: The composition modifier can be used to generate images with a specific composition, such as a symmetrical or asymmetrical composition.
Time of Day: Generate images with different lighting and ambience for different times of day (e.g. morning, noon, evening, night).
Weather: Generate images with different weather conditions (e.g. sunny, cloudy, rainy, snowy).
Perspective: Generate images with different perspectives, such as aerial, bird's-eye view, or worm's-eye view.
Scale: Generate images with different scales, such as macro or micro photography.
Angles: Generate images with different angles, such as overhead, side view or front view.
Proportion: Generate images with different proportions, such as short and wide or tall and narrow.
Line Weight: Generate images with varying line weights, such as thin or thick lines.
Form: Generate images with different forms, such as geometric or organic shapes.
Noise: Generate images with different noise levels, such as grainy or pixelated.
Saturation: Generate images with different saturation levels, such as high contrast or muted colours.
Blur: Generate images with different blur levels, such as sharp or blurry focus.
Texture Depth: Generate images with different levels of texture depth, such as rough or smooth surfaces.
Symmetry: Generate images with symmetrical or asymmetrical compositions.
Transparency: Generate images with varying levels of transparency or opacity.
Shadows: Generate images with different shadow effects, such as hard or soft shadows.
Grain: Generate images with different grain levels, such as a vintage or film look.
Shape: Generate images with different shapes, such as circles or squares.
Animation: Generate a series of images to create an animation or gif.
Speed: Generate images with different speed effects, such as motion blur or freeze frame.
Outline: Generate images with different levels of outlining, such as thick or thin outlines.
Depth of Field: Generate images with different depths of the field, such as shallow or deep focus.
Mood: Generate images with different moods, such as calm or chaotic.
Contrast: Generate images with different levels of contrast, such as high or low.
Focal Point: Generate images with different focal points, such as centred or off-centre.
Scale of Objects: Generate images with objects in different scales relative to one another.
Grain Size: Generate images with different grain sizes, such as fine or coarse.
Emphasis: Generate images with different emphases, such as highlighting or blurring certain areas.
Motion: Generate images with different motion effects, such as panning or zooming.
Shadow Direction: Generate images with shadows cast in different directions.
Transparency Gradient: Generate images with a gradient of transparency for a fading effect.
Object Placement: This modifier allows you to specify the placement of objects in the image, such as the position of a person or a building.
Colour Palette: This modifier allows you to specify the colour palette used in the generated image, such as a specific set of colours or a particular colour scheme.
Lighting: This modifier allows you to control the lighting in the image, such as the direction and intensity of the light source.
Background: This modifier allows you to specify the image's background, such as a specific image or colour.
Perspective: This modifier allows you to control the image's perspective, such as the position and angle of the camera.
The examples of algorithm modifiers I provided are general techniques that can be used in the development of text-to-image bots using various platforms or programming languages, including MIDJOURNEY. However, the specific implementation of these techniques may depend on the capabilities and features of the platform or tools you use.
MIDJOURNEY provides a flexible and customizable platform for creating conversational AI bots. It offers a variety of tools and integrations that can be used to create text-to-image bots. The algorithm modifiers' exact implementation will depend on your bot's specific use case and requirements, as well as your own programming and design skills.
By using these algorithm modifiers in combination with the textual description, you can control the content, style, and overall look of the images generated by MidJourney, allowing you to create images that match your desired vision.
Here are a few more examples of how you can use algorithm modifiers in MidJourney:
Example: "A [Background: beach]man [Object Placement: centre]walks down a [Color Palette: a warm]busy street in [Lighting: backlit]New York City"
In this example, the algorithm modifiers are used to specify the background of the image (a beach), the placement of the man in the centre of the image, the colour palette of warm colours, and the lighting as backlit.
Example 2: "A [Background: cityscape]gorgeous sunset [Color Palette: pastel]illuminates a [Object Placement: bottom]beach in Miami [Lighting: front lit]"

In this example, the algorithm modifiers are used to specify the background of the image (a cityscape), the colour palette of pastel colours, the placement of the beach at the bottom of the image, and the lighting as front-lit. These are just a few models of how you can use algorithm modifiers in MidJourney to control the content, style, and overall look of the images generated from textual descriptions. Using a combination of text and algorithm modifiers, you can create images matching your desired vision.
(--version or --v)
Command sample:
/imagine rocky mountains --version 1
/imagine rocky mountains --v 2
The "--version" command in text-to-image bots is a feature that allows you to check the version of the software or algorithm that the bot is using to generate images from text. This command can be useful for developers or users who want to keep track of algorithm changes or software updates.
When you run the "--version" command, the bot will typically display information about the version number, the release date, and any other relevant details about the software or algorithm. This information can be helpful for troubleshooting or diagnosing issues with the bot, and it can also help users understand the capabilities and limitations of the image generation algorithm.
In some cases, the "--version" command may also provide information about any dependencies or third-party libraries that the bot is using and any updates or changes to these components. This can be helpful for developers who want to ensure that their code is up to date and that they are using the latest tools and technologies to create their bot.
Overall, the "--version" command is a simple but useful feature that can provide valuable information about the software and algorithms used in text-to-image bots.
(--chaos or --c)
In image processing or other computer algorithms, initial image grids are often used to create new images or to manipulate existing ones. These grids can be thought of as a starting point for the algorithm to work from, and they can be generated in a variety of ways.
The "--chaos" parameter determines how much variation there will be in these initial grids. A high value for "--chaos" means that the algorithm will use more unpredictable and random elements to create the grid, resulting in a more diverse and unexpected set of starting points. This can lead to more creative and unique outcomes, but it can also make it harder to predict exactly what the final result will look like.
On the other hand, a lower value for "--chaos" will produce initial grids that are more consistent and predictable. This can be useful for tasks where the desired outcome is well-defined and needs to be reproducible, such as in scientific research or data analysis.
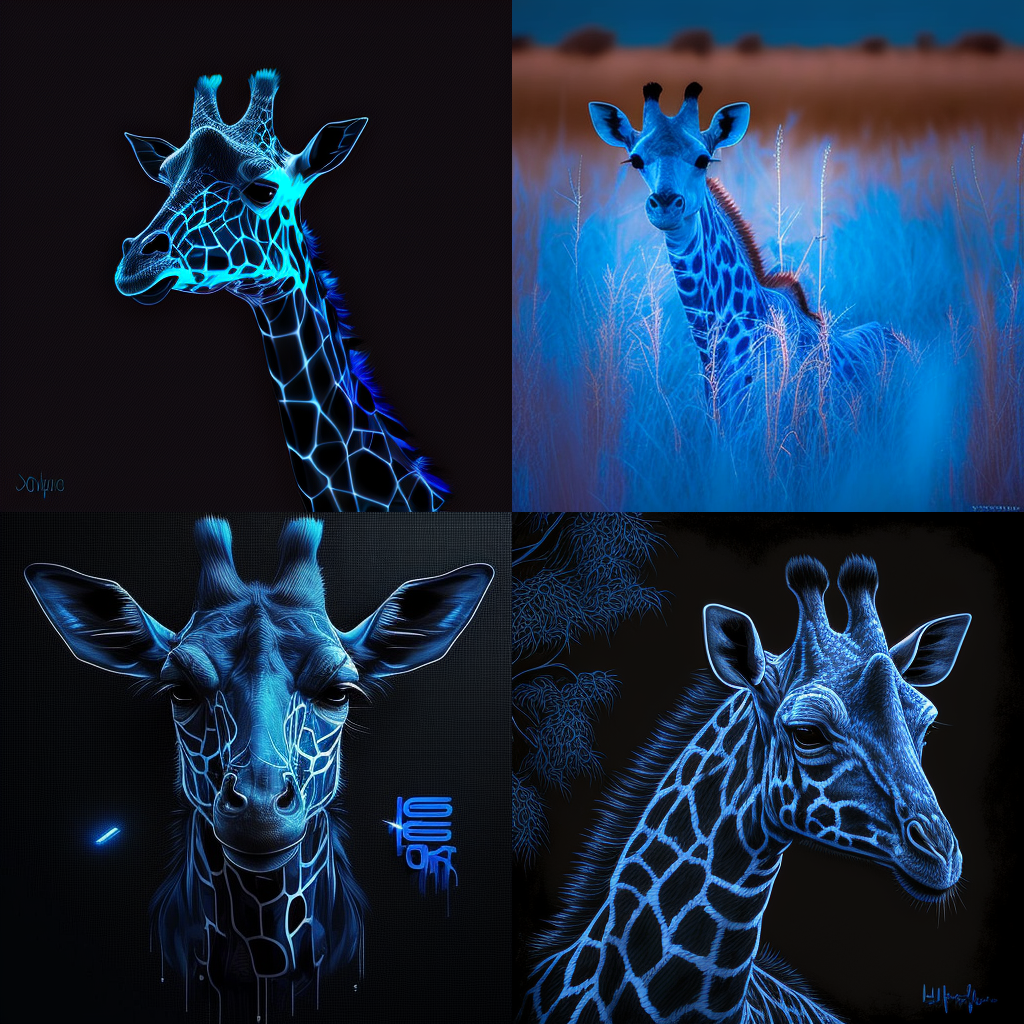
Example :
blue neon giraffe --c 50
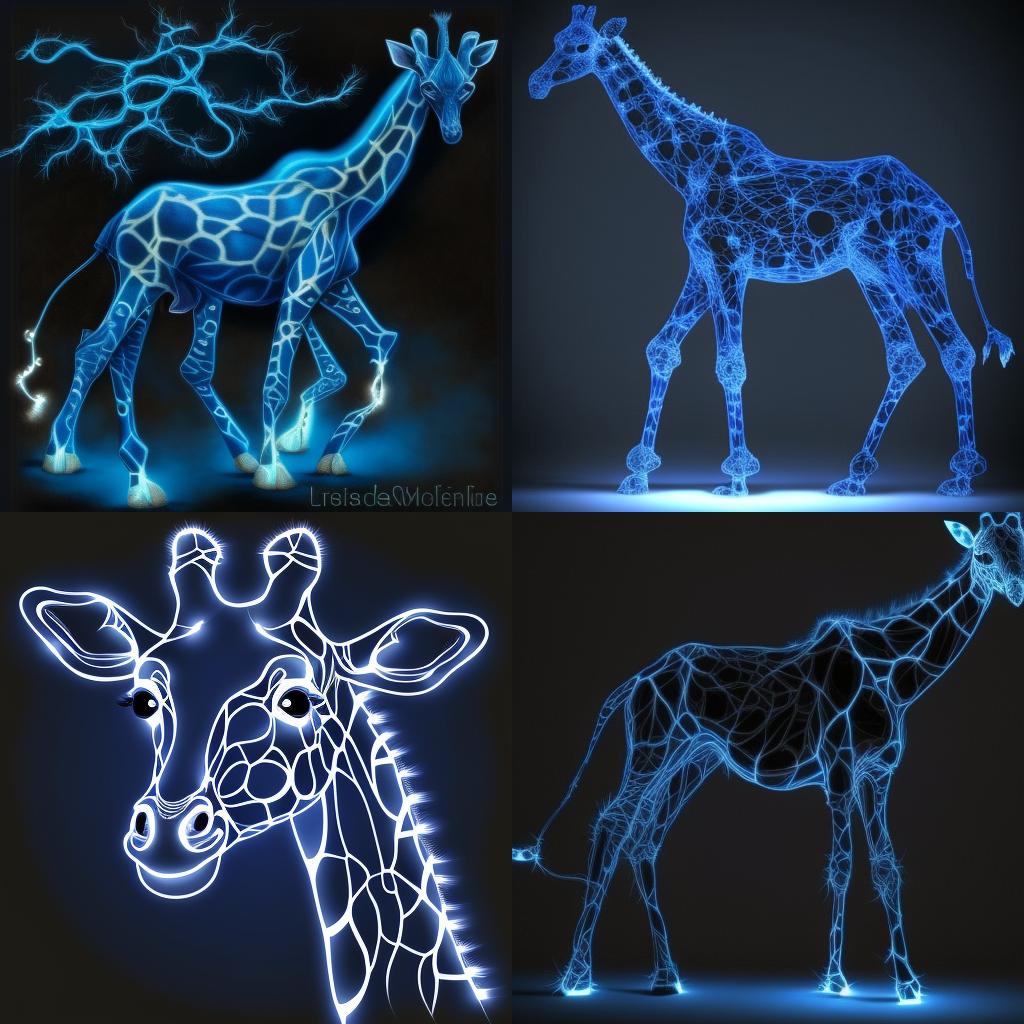
Example:
blue neon giraffe --c 100
High Definition
In MIDJOURNEY, you can generate high-definition (HD) images using the Image API, which is a feature that allows you to create and customize images in real time within your chatbot conversation. The Image API supports image generation in various resolutions, including HD resolutions.
To generate HD images in MIDJOURNEY, you can specify the desired resolution in the API request parameters. For example, you can set the width and height parameters to 1920 and 1080, respectively, to generate an HD image with a 1920 x 1080 pixels resolution.
Generating HD images can be more computationally intensive than generating lower-resolution images and may require more processing power to achieve the desired quality and level of detail. Therefore, optimising the image generation algorithm is important to balance image quality and performance.
In addition to setting the image resolution, you can also use various algorithm modifiers and settings in MIDJOURNEY, such as adjusting the image style, colour scheme, and lighting, to create high-quality HD images that meet your specific needs and requirements.
Here's an example of how you can use the High Definition option in MidJourney:
Example:
"Create a [High Definition] image of a [1][Background: beach][3]man [Object Placement: center]surfing [Lighting: backlit]on a sunny day"

In this example, the High Definition option is selected, ensuring that the image generated from this textual description will be high quality. The other algorithm modifiers are used to specify the background of the image (a beach), the placement of the man in the centre of the image, and the lighting as backlit. The resulting image will be a high-quality representation of a man surfing on a sunny day at the beach.
Applying the high-definition parameter (-hd) uses a different algorithm that may work better for larger images.
However, it is also known to be less consistent with compositions.
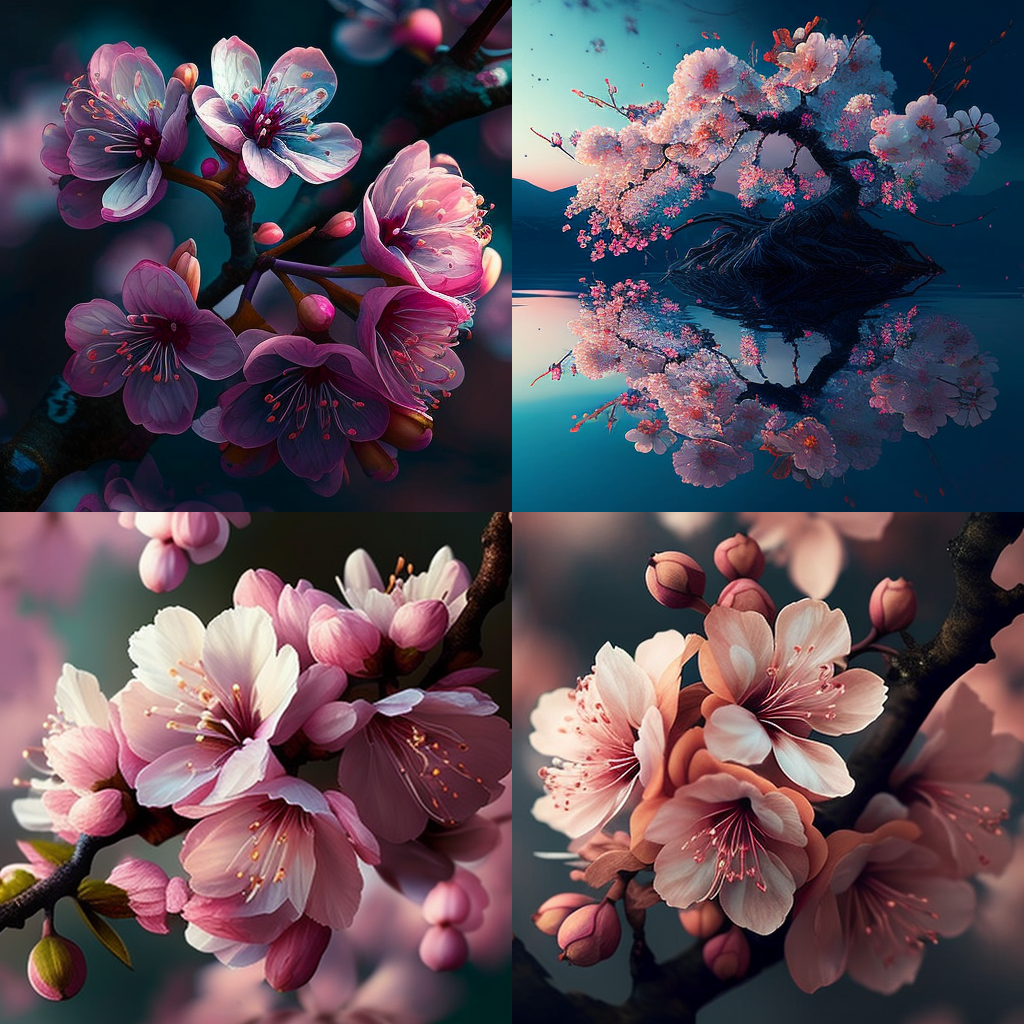
example:
a beautiful cherry blossoms -- hd
Negative Prompting (--no)
A negative prompt in MidJourney refers to a textual description that includes negative words, such as "not", "no", "without", etc. These negative words can be used to specify what should not be included in the image that is generated from the textual description. Negative prompts can be useful in MidJourney when you want to create images that meet specific requirements or constraints. Using negative prompts in conjunction with other algorithm modifiers, you can fine-tune the images generated from your textual descriptions to meet your specific needs.
Example 3: "Create an image of a [Background: beach] -- no clouds"
In this example, the negative prompt "without any clouds" specifies that the generated image should not include any clouds. The algorithm will use this information to generate an image of a beach without any clouds in the sky. You can generate images tailored to your specific needs and requirements by combining positive and negative prompts.
Midjourney commands also support so-called negative prompting (--no), which allows you to exclude certain elements that your prompt might imply.
Command sample: a beautiful Italian landscape --no sunshine
Detail Modifiers
Detail Modifiers in MidJourney refer to optional parameters that can specify additional details about the objects or characters in the image. These parameters can be used to control various aspects of the objects, such as their colour, texture, size, and more.
Here are some examples of Detail Modifiers in MidJourney:
Example 1: "Create an image of a [Background: forest]man [Object Placement: centre]carrying a [Color: red]basket of [Color: yellow]apples [Object Size: medium]"
In this model, the Detail Modifiers "Color: red" and "Color: yellow" specify the colours of the basket and apples, respectively. The "Object Size: medium" modifier specifies the size of the basket. The algorithm will use this information to generate an image of a man carrying a red basket of yellow apples that is medium in size.
Example 2: "Create an image of a [Background: mountain]woman [Object Placement: centre]skiing [Object Size: large]downhill [Lighting: backlit]"
In this example, the Detail Modifier "Object Size: large" specifies the woman's size. The algorithm will use this information to generate an image of a large woman skiing downhill on a mountain with backlit lighting. You can create greater precision and detailed images using these parameters in combination with other algorithm modifiers. The exact list of available Detail Modifiers may vary depending on the specific version of MidJourney you are using, so it's a good idea to consult the documentation for the specific version you are using to see all available options.
(--stop)
With detail modifiers (--stop), you can force the Midjourny bot to stop generating images after a certain level of progress.
The benefit of this is that it saves you time while you try to find the right initial prompt.
Command sample: car workshop --stop 50
Seed Numbers
Seed numbers in MidJourney are random numbers used to initialise the random number generator in the image generation process. The idea is that by using a specific seed number, you can ensure that the algorithm will generate the same image each time you run it with that seed number, allowing you to compare different versions of the image more easily or to keep track of changes to the image over time.
Here's an example of how you might use a seed number in MidJourney:
Example: "Create an image of a [Background: park] with a [Object: fountain] [Object Placement: centre] [Seed Number: 123456789]"
In this example, the seed number "123456789" is specified as a parameter in the prompt. The algorithm will use this seed number to initialise the random number generator when generating the image. This means that each time you run the algorithm with the same prompt and seed number, it will generate the same image of a park with a fountain in the centre.

You can gain greater control over the image generation process using seed numbers and create more consistent results over time. Note that the exact behaviour of seed numbers may vary depending on the specific version of MidJourney you are using, so it's a good idea to consult the documentation for the specific version you are using to see all available options.
Stylize (--stylise or --s).
MidJourney supports various stylise models, each of which can give your generated images a unique and visually distinct look. Here are some of the most common stylise models available in MidJourney:
Impressionist: Applies an Impressionist style to the image, characterised by visible brushstrokes and a focus on capturing the essence of a scene rather than its exact details.
Abstract: Applies an Abstract style to the image, characterised by bold colours, fluid shapes, and a focus on form over detail.
Minimalist: Applies a Minimalist style to the image, characterised by a focus on simple shapes and a limited colour palette.
Cartoony: Applies a Cartoony style to the image, characterised by exaggerated features, bold outlines, and a focus on humour.
Realistic: Applies a Realistic style to the image, characterised by a focus on exact details, accurate shadows and highlights, and a lifelike appearance.
Watercolour: Applies a Watercolor style to the image, characterised by a soft and delicate appearance, with visible brushstrokes and a focus on colour blending.
Surreal: Applies a Surreal style to the image, characterised by dream-like elements and a focus on creating a sense of disorientation or disbelief.
Art Deco: Applies an Art Deco style to the image, characterised by bold lines, geometric shapes, and a focus on luxury and glamour.
Pop Art: Applies a Pop Art style to the image, characterised by bold colours, thick outlines, and a focus on creating a playful, vibrant appearance.
Gothic: Applies a Gothic style to the image, characterised by dark colours, elaborate details, and a focus on creating an ominous or eerie atmosphere.
Renaissance: Applies a Renaissance style to the image, characterised by intricate details, lifelike shading, and a focus on creating a classical, timeless appearance.
Futuristic: Applies a Futuristic style to the image, characterised by sleek lines, vibrant colours, and a focus on creating a technologically advanced look.
Vintage: Applies a Vintage style to the image, characterised by muted colours, soft focus, and a focus on creating a nostalgic, aged look.
Grunge: Applies a Grunge style to the image, characterised by rough textures, dark colours, and a focus on creating a gritty, urban appearance.
Monochrome: Applies a Monochrome style to the image, characterised by a focus on black and white tones, with limited use of colour.
Art Nouveau: Applies an Art Nouveau style to the image, characterised by flowing lines, organic shapes, and a focus on creating a natural, fluid appearance.
Cubist: Applies a Cubist style to the image, characterised by angular shapes, bold colours, and a focus on creating a fragmented, abstract appearance.
Expressionist: Applies an Expressionist style to the image, characterised by bold brushstrokes, bright colours, and a focus on capturing emotional intensity.
Photorealistic: Applies a Photorealistic style to the image, characterised by high levels of detail, lifelike shading, and a focus on creating a highly realistic appearance.
Minimalist: Applies a Minimalist style to the image, characterised by simple shapes, limited use of colour, and a focus on creating a clean, streamlined appearance.
Modernist: Applies a Modernist style to the image, characterised by clean lines, simple shapes, and a focus on creating a sleek, contemporary appearance.
Futurism: Applies a Futurism style to the image, characterised by geometric shapes, bright colours, and a focus on creating a modern, technological look.
Artistic: Applies an Artistic style to the image, characterised by creative use of colour, bold brushstrokes, and a focus on capturing emotion and movement.
Hyperrealistic: Applies a Hyperrealistic style to the image, characterised by extreme attention to detail, lifelike shading, and a focus on creating a highly realistic appearance.
Fauvist: Applies a Fauvist style to the image, characterised by bold, bright colours, expressive brushwork, and a focus on creating a vibrant, emotional appearance.
Surrealist: Applies a Surrealist style to the image, characterised by dream-like elements, unexpected juxtapositions, and a focus on creating a disorienting, irrational appearance.
Geometric: Applies a Geometric style to the image, characterised by simple shapes, clean lines, and a focus on creating a structured, mathematical appearance.
Abstract Expressionist: Applies an Abstract Expressionist style to the image, characterised by bold brushstrokes, gestural marks, and a focus on capturing raw emotion.
Post-Impressionist: Applies a Post-Impressionist style to the image, characterised by bold colours, thick brushwork, and a focus on capturing emotional intensity.
Futuristic Cyberpunk: Applies a Futuristic Cyberpunk style to the image, characterised by bold colours, high-tech elements, and a focus on creating a dystopian, technologically advanced look.
Abstract Cubism: This applies an Abstract Cubism style to the image, characterised by geometric shapes, bold colours, and a focus on creating a fragmented, abstract appearance.
Neo-Expressionist: This applies a Neo-Expressionist style to the image, characterised by bold colours, thick brushwork, and a focus on creating a raw, emotional appearance.
Hard-Edge: This applies a Hard-Edge style to the image, characterised by sharp lines, simple shapes, and a focus on creating a clean, structured appearance.
Op Art: Applies an Op Art style to the image, characterised by optical illusions, bold colours, and a focus on creating a visually confusing or disorienting appearance.
Neo-Futurist: Applies a Neo-Futurist style to the image, characterised by sleek lines, bright colours, and bold, bright colours that grab the viewer's attention and convey a sense of energy and vibrancy. Neo-Futurist image creators often value the process of creation over the finished product. They may use techniques such as layering, scraping, and erasing to create dynamic and full-of-movement images.
One of the more difficult but fun Midjourney commands is "stylise" (--stylise or --s).
It defines how strong the stylisation of your images should be.
Higher values lead to more opinionated images, while lower values should normally stick closer to your prompt.
Examples of values supported by version 3 of Midjourney:
625 will be very strict and less artistic
1250 is less strict but still pretty (low)
2500 is the default value
20000 will start to drift from your text (high)
60000 is the maximum value you can set (max)
If you are using version 4, then we recommend experimenting with the following values for the –stylise parameter:
0: Very strict
100: Default value
500: More Artistic
1000: Very artistic and highly detailed.
Descriptive adjectives
Here are some examples of adjectives that you could use in your Midjourney prompts to help customise the generated image:
Happy Sad Calm Excited Relaxed Energetic Grumpy Nostalgic Majestic Whimsical
Mysterious Intense Romantic Playful Dreamy Elegant Majestic Whimsical Majestic Majestic Joyful Gloomy Tranquil Thrilled Peaceful Busy Irritated Melancholic Grand
Fantastical Enigmatic Fierce Passionate Cheerful Dreamlike Refined Regal Surreal Majestic
Humorous Radiant Pensive Dynamic Soothing Charismatic Nostalgic Powerful Enchanted
Graceful Radiant Soft
These adjectives can describe various aspects of the image, such as the subject, mood, or environment. For example, you could use the adjective "radiant" to describe a beautiful sunrise or "enigmatic" to describe a mysterious forest. The more adjectives you include in your prompt, the more specific you can make the generated image.
Realistic Futuristic Cartoon Colourful Powerful Beautiful, handsome, cute Scary, angry
Sad, depressed
Art Styles
Here are 50 different art styles that you could use in your Midjourney prompts to help stylise the generated image:
Abstract Realistic Impressionistic Surreal Pop Art Expressionistic Futuristic Gothic Minimalistic Art Nouveau Abstract Expressionism Renaissance Baroque Rococo Neo-Classical Romanticism Abstract Impressionism Modernism Fauvism Expressionism Cubism Surrealism Dadaism Constructivism Art Deco Futurism Fauvism Neo-Impressionism Pointillism Primitivism Abstract Symbolism Abstract Surrealism Abstract Futurism Abstract Cubism Abstract Dadaism Abstract Pop Art Abstract Renaissance Abstract Baroque Abstract Rococo Abstract Neo-Classical Abstract Romanticism Abstract Art Nouveau
Abstract Neo-Impressionism Abstract Pointillism Abstract Primitivism Abstract Expressionistic Abstract Surrealistic Abstract Impressionistic Abstract Realistic
By including the name of a specific art style in your Midjourney prompt, you can generate an image with a certain visual aesthetic. For example, you could use the art style "Pop Art" to create a vibrant, colourful image or the art style "Realistic" to create an image that resembles a photograph. The more specific you are with your art style choice, the more tailored the generated image will be to your desired aesthetic.
Fantasy
Wizard
Magician
Witch
Elf
Angel
Influential artists
There are many famous artists throughout history who have made significant contributions to the fields of painting and design. Here is a list of some of the most well-known and influential artists in these areas:
Leonardo da Vinci Vincent van Gogh Pablo Picasso Michelangelo Rembrandt van Rijn
Johannes Vermeer Claude Monet Salvador Dali Georgia O'Keeffe Wassily Kandinsky
Henri Matisse Gustav Klimt Edward Hopper Frida Kahlo Andy Warhol Jackson Pollock
Roy Lichtenstein Jean-Michel Basquiat Keith Haring Banksy Caravaggio Sandro Botticelli
Johannes Itten Edward Burne-Jones Paul Cézanne Édouard Manet Paul Gauguin Wassily Kandinsky
Marc Chagall Kazimir Malevich Joan Miró Mark Rothko Willem de Kooning Francis Bacon
Lucian Freud David Hockney Damien Hirst Anish Kapoor Yayoi Kusama Jeff Koons Caravaggio Sandro Botticelli Johannes Itten Edward Burne-Jones Paul Cézanne Édouard Manet Paul Gauguin
Wassily Kandinsky Marc Chagall Kazimir Malevich Joan Miró Mark Rothko Willem de Kooning
Francis Bacon Lucian Freud David Hockney Damien Hirst Anish Kapoor Yayoi Kusama Jeff Koons
Caravaggio Sandro Botticelli Johannes Itten Edward Burne-Jones Paul Cézanne Édouard Manet
Paul Gauguin Wassily Kandinsky Marc Chagall Kazimir Malevich Joan Miró Mark Rothko
Willem de Kooning Francis Bacon Lucian Freud David Hockney Damien Hirst Anish Kapoor
Yayoi Kusama Jeff Koons
Of course, there are many other artists who have made important contributions to painting and design, and this list is by no means exhaustive. However, these artists are widely recognized and celebrated for their unique styles and artistic vision. These artists have all made significant contributions to the world of art and design, and their work continues to inspire and influence new generations of artists.
Storytelling
Storytelling titles can be used as prompts to inspire your creativity, but they are not the only way to approach storytelling. Don't be afraid to come up with your own titles or unique twists on these classic themes. The most important thing is to let your imagination guide you and tell stories that are uniquely your own.
The Hero's Journey The Quest Overcoming Adversity Love and Loss A Timeless Tale
The Power of Friendship Discovering Your Identity The Journey Home The Call of Adventure
A Stranger Comes to Town A Tale of Two Cities A Picture is Worth a Thousand Words The Butterfly Effect A Walk in the Woods A Trip Down Memory Lane A Fish Out of Water The Road Not Taken The Gift of Giving The Beauty of Simplicity The Power of Imagination The Unlikely Hero A Battle of Wits A World Beyond The End of an Era The Shadow Self A Twist of Fate The Road to Redemption Life Lessons Learned
A Chance Encounter The Circle of Life The Weight of Responsibility A Trail of Clues A Brush with Danger In the Eye of the Storm A Time for Change The Power of Forgiveness Finding Your Voice The Deepest Fear A Song of Hope The Key to the Kingdom A World of WonderA Journey to Remember A Dance with Destiny The Treasure Hunt The Price of Freedom A Step into the Unknown The Ties That Bind A Trailblazer's Journey The Heart of the Matter The Road to Recovery A Time of Reflection The Struggle for Survival
The Road to Glory A Flash of Inspiration The Strength of Family The Journey of Self-Discovery The Power of Hope The Power of Perseverance The Beauty of Diversity The Light in the Darkness A Tale of Mystery and Intrigue The Art of Deception The Power of Love and Loyalty The Power of Faith A Journey into the Past A Battle for the Ages A Trail of Tears The Limits of Power A Walk on the Wild Side The Price of Ambition The Secret of Success The Heart of a Hero The Beauty in Imperfection
The Road Less Traveled The Call of the Wild The Weight of the World A World of Magic and Wonder
The Fight for Justice The Journey of a Lifetime The Quest for Knowledge
Multiple Prompts “::”
you can provide multiple prompts to the Midjourney Bot by separating them with "::" (double colons). This is known as providing "multi-prompts." Each prompt is treated as a separate concept, and the bot will consider each prompt individually when generating its response.
Providing multi-prompts can be useful when you want to give the bot more information or context to work with, or when you want to emphasize certain concepts over others. By separating prompts with "::", you can assign relative importance to each part of the prompt, allowing the bot to better understand your intended meaning and provide a more accurate response.
healthy eating :: I'm looking to incorporate more plant-based foods into my diet :: Also, I'm concerned about getting enough protein."

In this example, the prompt includes three separate concepts, each separated by "::". The first concept is "healthy eating", which is the primary focus of the prompt. The second concept is "incorporating more plant-based foods into my diet", which is an additional request for information that is related to the primary concept. The third concept is "concerns about getting enough protein", which is another additional request for information that is also related to the primary concept, but emphasizes a specific aspect of it.
By separating the prompts with "::", you are providing the Midjourney Bot with multiple pieces of information that it can use to generate a response. This can help the bot understand your intentions more clearly and provide a more relevant and personalized response to your request for advice on healthy eating.
Remix
Remix Mode is a feature that allows you to generate variations of an image or output by adjusting certain parameters or settings. This feature can be activated in different ways depending on the software or application being used.
To activate Remix Mode, you can use the "/prefer remix" command or the "/settings" command and toggle the 🎛️ Remix Mode button. This will change the behaviour of the variation buttons (V1, V2, V3, V4) under image grids, allowing you to edit your prompt during each variation. To generate variations with Remix Mode enabled, you can select the 🪄 "Make Variations" option.
When Remix Mode is enabled, the variation buttons will turn green when used instead of blue. You can also switch between different model versions when using Remix Mode.
When you are done using Remix Mode, you can turn it off by using the "/settings" or "/prefer remix" command again.
If you do not want to modify your prompt during a variation, you can create a standard image variation by not making any changes in the pop-up window.

Agile & UI Design
Agile & UI Design

Agile is a project management and product development approach that prioritizes flexibility and collaboration. It is based on the Agile Manifesto, a set of values and principles for Agile software development that was first introduced in 2001. The Agile Manifesto values "individuals and interactions, working software, customer collaboration, and responding to change" over processes and tools.
The Agile methodology is based on iterative and incremental delivery, where requirements and solutions evolve through the collaborative efforts of self-organizing and cross-functional teams. Agile teams work in short sprint cycles, typically lasting 1-4 weeks. During each sprint, the team chooses a set of high-priority features or requirements to work on, and at the end of the sprint, the team demonstrates a potentially shippable product increment.
One of the key characteristics of Agile is its emphasis on flexibility and the ability to adapt to change. As a result, agile teams are able to respond to changing requirements and priorities by regularly re-evaluating and adjusting their plans. This is in contrast to traditional project management approaches, which often rely on a detailed plan set in stone at the beginning of the project.
Another essential aspect of Agile is the focus on frequent communication and collaboration between team members and stakeholders. Agile teams use daily stand-up meetings, sprint planning and review meetings, and retrospective meetings to ensure that everyone is on the same page and that any issues or concerns are addressed in a timely manner.
There are several frameworks that implement Agile methodology, the most popular ones are Scrum and Kanban. Scrum is a framework for managing complex projects and is often used in software development. It includes roles such as the Scrum Master, Product Owner, and Development Team, as well as ceremonies such as Sprint Planning, Daily Scrum, Sprint Review, and Sprint Retrospective. Kanban is a framework for managing and improving workflows, it focuses on visualizing the flow of work, limiting work in progress, and making process policies explicit.
In summary, Agile is a flexible, collaborative approach to project management and product development that emphasizes iterative progress, the ability to adapt to change, and frequent communication. It is implemented using frameworks such as Scrum and Kanban, and is widely used in software development, but can be applied to any project.

On the other hand, UI design typically involves several stages, including research, planning, design, and testing. Here is a more detailed explanation of each step and how the UI designer may collaborate with the team during each stage:
Research: The first stage of UI design is research. The UI designer works with the product owner, stakeholders, and other team members to understand the requirements and goals of the project. The designer may conduct user research and usability testing to gather feedback on the user interface and ensure that it meets end-users' needs.
Planning: During the planning stage, the UI designer works with the product owner and other stakeholders to create a design plan that outlines the overall design direction, the layout, and the visual elements of the user interface. The designer may create wireframes, mockups, and high-fidelity designs to visualize the user interface. The designer also works with the development team to ensure that the designs are feasible and can be implemented within the sprint.
Design: In the design stage, the UI designer creates detailed design assets, such as icons, buttons, and other visual elements. The designer also works on creating design systems that can be reused across different project parts. This helps to ensure consistency in the user interface and can make it easier for the development team to implement the designs.
Development: During the development stage, the UI designer works closely with the development team to ensure that the user interface is implemented correctly. The designer may provide guidance on design decisions, provide design assets, and work with the development team to resolve any design-related issues.
Testing: Before the end of the sprint, the UI designer reviews and tests the user interface to ensure that it meets the requirements and is visually appealing. If there are any issues, the designer works with the team to resolve them before the sprint ends.
Review and Retrospective: The UI designer participates in Sprint Retrospective meetings, where the team reflects on what went well and what didn't go well during the sprint. This helps the designer understand the challenges faced by the development team and plan for the next sprint.
In an Agile team, a UI designer typically collaborates closely with other team members to design and develop user interfaces that are both functional and visually appealing. Here are a few ways a UI designer might collaborate in an Agile team:
Participating in Sprint Planning: During sprint planning, the team sets goals and priorities for the upcoming sprint. The UI designer works with the product owner and other stakeholders to understand the sprint's requirements and plan how the team will design and implement the user interface.
Designing and prototyping user interfaces: During the sprint, the UI designer works on designing and prototyping the user interface. This may involve creating wireframes, mockups, and high-fidelity designs. The designer works closely with the development team to ensure that the designs are feasible and can be implemented within the sprint.
Collaborating with Developers: The UI designer works closely with developers to ensure that the user interface is implemented correctly. This may involve providing guidance on design decisions, providing design assets, and working with the development team to resolve any design-related issues.
Participating in Daily Stand-Ups: The UI designer participates in daily stand-up meetings, where the team discusses progress, roadblocks and next steps. This helps the designer stay updated on the project's progress and provide any help to the development team.
Reviewing and testing the user interface: Before the end of the sprint, the UI designer reviews and tests the user interface to ensure that it meets the requirements and is visually appealing. If there are any issues, the designer works with the team to resolve them before the sprint ends.
Participating in Sprint Retrospective: The UI designer participates in Sprint Retrospective meetings, where the team reflects on what went well and didn't go well during the sprint. This helps the designer understand the challenges faced by the development team and plan for the next sprint.
In an Agile team, the UI designer plays a critical role in ensuring that the user interface is functional, visually appealing, and meets the project's requirements. In addition, by working closely with other team members and participating in Agile ceremonies, the UI designer helps to ensure the project's success.
In overview, Agile is a flexible, collaborative approach to project management and product development that emphasizes iterative progress, the ability to adapt to change, and frequent communication. It is implemented using frameworks such as Scrum and Kanban, and is widely used in software development, but can be applied to any project.
The importance of Agile:
Agile is an essential methodology for software development because it prioritizes flexibility, collaboration, and adaptability. Here are a few reasons why Agile is particularly important in software development:
Rapid development: Agile is an iterative and incremental approach that allows software development teams to develop and deliver working software rapidly. By working in short sprints, teams can quickly deliver new features and functionality to users.
Flexibility: Agile is a highly flexible methodology that allows teams to adapt to changing requirements and priorities. This is particularly important in software development, where requirements can change quickly and unexpectedly.
Collaboration: Agile emphasizes collaboration between team members, stakeholders, and users. This helps to ensure that the software being developed meets the users' needs and is aligned with the business's goals.
Continuous improvement: Agile encourages continuous improvement through regular retrospectives. This helps teams to identify and address issues and to make improvements that can lead to better software development.
Customer focus: Agile emphasizes customer collaboration and the ability to respond to change, which helps to ensure that the software being developed meets the users' needs and is aligned with the business's goals.
Quality: Agile approach, with a focus on testing and continuous integration, helps the team to deliver software with high quality, and this is very important in software development as software with low quality can have a significant impact on the users and the business.
In summary, Agile is an important methodology for software development because it allows teams to rapidly develop and deliver working software, adapt to changing requirements, collaborate effectively, and continuously improve the quality of the software. The agile approach provides a framework for the software development teams to work efficiently and effectively, leading to the delivery of high-quality software that meets the needs of the users and the business.

The future of the UX design
The future of the UX design

User experience design is a field that is constantly evolving and being shaped by advancements in technology and changes in user behaviour. As such, making specific predictions of the future of UX design can be challenging. However, several trends are likely to continue to shape the field in the coming years.
One trend likely to continue is an increased focus on creating personalized and intuitive experiences. With the rise of big data and the increasing availability of information about user behaviour, designers can make more personalized and tailored experiences tailored to the specific needs and preferences of individual users. This will involve data and analytics to inform design decisions and will likely lead to a greater emphasis on user-centred design.

Another trend likely to shape the future of UX design is the continued integration of AI and machine learning into the design process. As these technologies become more advanced and widely adopted, they will enable designers to create more intelligent and responsive interfaces that can adapt to the needs and behaviour of users in real-time. This will allow designers to create more intuitive and personalized experiences and will likely lead to a greater emphasis on using data and analytics to inform design decisions.
In addition to these trends, there may also be an increased focus on designing for accessibility and inclusivity. As the population ages and becomes more diverse, designers will need to consider the needs of users with a wide range of abilities and backgrounds. This will involve creating interfaces that are easy to use and understand and accessible to users with disabilities.

Finally, virtual and augmented reality in the design process may become more prevalent. As these technologies become more advanced and widely adopted, they will enable designers to create more immersive and engaging experiences that can transport users to different environments and contexts. This will allow designers to create more realistic and lifelike interfaces and will likely lead to a greater focus on creating immersive and engaging experiences.
Here are some examples of how these trends in UX design may be applied in practice:
Personalized and intuitive experiences:
A personalized news website that uses data about a user's browsing history and preferences to curate a personalized feed of articles. The website's design may also be tailored to the user's preferences, such as font size and colour scheme.
Integration of AI and machine learning:
A chatbot that can assist users in finding the right product on an e-commerce website. The chatbot uses machine learning algorithms to understand the user's intent and provide relevant recommendations.
Designing for accessibility and inclusivity: A mobile banking app that is designed to be used by people with visual impairments. The app includes a feature that reads out the text on the screen and also includes high-contrast colour schemes and larger text.
Use of virtual and augmented reality in the design process: A virtual reality app that allows users to explore a new city before they visit it. The app uses virtual reality technology to create an immersive experience, allowing users to explore different neighbourhoods and landmarks.
A grocery store app that uses machine learning to create personalized shopping lists and user recommendations. The app would track the user's shopping history, preferences, and dietary restrictions to suggest products they may be interested in purchasing. Additionally, the app could use location-based services to provide users with information about sales and promotions at the specific store they are shopping at. The app could also help with the shopping experience by allowing users to create virtual carts and even use AR to show what the product looks like before buying it.
In this example, integrating AI and machine learning would enable the grocery store to provide users with a more personalized and convenient shopping experience. By using data about the user's shopping history and preferences, the app could make more relevant product recommendations and help users find the products they need more quickly. Let me explain in more detail:
The grocery store app would use machine learning algorithms to analyze a user's shopping history, preferences, and dietary restrictions in order to make personalized product recommendations. For example, if a user frequently purchases organic fruits and vegetables, the app might suggest similar products or recipes that include those ingredients. The app could also take into account any dietary restrictions or allergies the user has specified and make suggestions for suitable products.
In addition to personalized product recommendations, the app would also use location-based services to provide users with information about sales and promotions at the store they are shopping at. For example, suppose a user is shopping at a store currently offering an advertisement for a particular cereal brand. In that case, the app will notify the user and provide information about the promotion. This would help the user to save money and make more informed purchasing decisions.
The grocery store app could also use augmented reality (AR) to enhance the shopping experience. For example, users could use their smartphones to scan products and see them in 3D, with information such as nutritional information, ingredients, and even a video of the product being made. This would allow users to make more informed purchasing decisions and make the shopping experience more interactive and engaging.
Another feature that could be added to the app is allowing users to create virtual carts. Users can add products to their cart and then use the app to navigate the store and quickly find the products they want. They can also use the app to scan products, add them to the cart, and get real-time updates on the total cost of their purchase. This feature would save users time and make the shopping experience more convenient and efficient.
Overall, integrating AI and machine learning in a grocery store app would enable the store to provide a more personalized and convenient shopping experience for users. By using data about the user's shopping history and preferences, the app could make more relevant product recommendations, and location-based services would help users save money and make more informed purchasing decisions. Additionally, using AR and virtual cart features would make the shopping experience more interactive and engaging for the users.
These are just a few examples of how these trends in UX design can be applied in practice. There are many other possibilities and new trends that are emerging in the field of User Experience design.
In conclusion, UX design is constantly evolving and being shaped by technological advancements and changes in user behaviour. While it can be difficult to make specific predictions about the future of UX design, several trends are likely to continue to shape the field in the coming years, including an increased focus on creating personalized and intuitive experiences, a greater emphasis on using data and analytics to inform design decisions, and continued integration of AI and machine learning into the design process. Additionally, designers may focus more on designing for accessibility and inclusivity, and the use of virtual and augmented reality in the design process may become more prevalent.

Empathy
Empathy

Empathy is a critical element of the user-centred design process and is crucial for understanding the users' needs and goals. It allows designers to put themselves in the users' shoes and understand their perspective, which is essential in creating a design that meets their needs.
One of the main ways that empathy can help UX designers is by allowing them to conduct user research that is more effective and accurate. Empathy allows designers to ask more relevant questions and gather more meaningful data during research. This leads to a better understanding of the users' needs and pain points, which informs the design process. For example, if a designer can empathize with a user, they can understand that the user might have a hard time seeing small text on a screen and can design a solution to increase the font size.
Empathy is also essential during the design process itself, as it allows designers to create solutions that are intuitive and easy to use. By understanding the users' perspective, designers can create more user-friendly interfaces, and that feels natural to interact with. For example, a designer that can empathize with a user that has difficulty navigating through a website can design a more intuitive navigation system.

Empathy is also vital during testing, as it allows designers to understand how users interact with the design and where they are experiencing difficulties. This helps designers identify and address any design issues and make improvements that lead to a better user experience. For example, when designers can empathise with the users, they can understand why a user might struggle to complete a task and can design a solution to make it easier.
Inclusive design is also one of the benefits of empathy in UX design. Empathy allows designers to create solutions that are accessible to all users, regardless of their abilities or background. This is crucial for creating designs that are inclusive and that do not discriminate against any group of users. For example, a designer that can empathise with a user that is visually impaired can design a website that is more accessible by including larger text and more contrast.
Steps
User Research: Conducting user research is a crucial step in incorporating empathy into the UX design process. It helps designers to understand the users' needs, goals, and pain points. This can include surveys, interviews, and user testing. By understanding the users' perspective, designers can create solutions that are tailored to their needs. For example, if a designer can empathise with a user, they can understand that the user might have a hard time seeing small text on a screen and can design a solution to increase the font size.
Empathy Mapping: Empathy mapping is a technique that helps designers to understand the users' thoughts, feelings, and actions in relation to a specific problem or task. It's a visual representation of the user's journey, which allows designers to understand the user's experience and empathise with them. In addition, empathy maps can include information such as user demographics, pain points, and goals, which helps designers to understand the user's perspective and create solutions that meet their needs.
Personas: Personas are fictional characters representing the different types of users for which the design is intended. They help designers to empathise with the users and to create solutions that meet their needs. Personas are based on the research conducted in the previous steps and enable designers to keep the users in mind throughout the design process.
User Testing: User testing is essential in incorporating empathy into the UX design process. It helps designers to understand how users interact with the design and where they are experiencing difficulties. By empathising with the users, designers can understand why a user might struggle to complete a task and can design a solution to make it easier.
Inclusive Design: Incorporating inclusive design principles is crucial in incorporating empathy into the UX design process. It allows designers to create solutions that are accessible to all users, regardless of their abilities or background. By empathising with users, designers can understand the needs of users with disabilities and design solutions that meet their needs.
Continuous Empathy: Empathy is not a one-time step; it's a continuous process. As the design changes, designers should continuously empathise with the users to ensure that the design is meeting their needs. This can include conducting user research and testing, as well as incorporating feedback from users into the design process.
In summary, incorporating empathy into the UX design process is crucial for creating solutions that truly meet the needs of the users. By understanding the users' perspective and empathising with them, designers can create solutions that are intuitive, user-friendly, accessible, and inclusive, which leads to better user experiences.
Empathy map

An empathy map is a visual representation of the user's experience, which is created by gathering information from user research. The map helps designers to understand the user's thoughts, feelings, actions, and pain points, which allows them to empathise with the user and create solutions that meet their needs. Here is more detail on the steps for creating an empathy map:
Gather Information: The first step in creating an empathy map is to gather information about the users, their needs, and the goals of the project. This information can be obtained through user research, such as surveys, interviews, and user testing. It's essential to gather information from a diverse group of users to ensure that the map is representative of all the users.
Create a template: Once you have the information, create a template for the empathy map. The template should have four quadrants: "Think & Feel", "Say & Do", "Hear & See", and "Pain & Gain". Each quadrant represents a different aspect of the user's experience. For example, the "Think & Feel" quadrant would include the user's thoughts, feelings, and emotions, while the "Say & Do" quadrant would include the user's actions and behaviours.
Fill in the template: Use the information gathered from user research to fill in the template. Be specific and use quotes or examples to make it more accurate. The empathy map should be detailed, and it should provide a clear picture of the user's experience.
Review and revise: Review the empathy map to ensure that it accurately represents the user's experience. Revise the map as needed to reflect the user's needs and goals better. It's essential to make sure that the map is accurate and that it provides a clear picture of the user's experience.
Use it to inform design: Use the empathy map to inform the design process. The map provides a detailed understanding of the user's experience, which can be used to create solutions that meet their needs. The empathy map should be used as a reference throughout the design process.
Keep it updated: Keep the empathy map updated throughout the design process. As the design changes, continue to gather feedback from users and update the map accordingly. This will ensure that the map accurately represents the user's experience and that the design meets their needs.
Persona

Creating personas is a professional and essential step in the user-centred design process, as it allows designers to understand the needs, goals, and characteristics of the users they are designing for. Personas are fictional representations of the target users based on research conducted during the early stages of the design process. They help to humanise the users, provide a clear understanding of their needs, goals, and pain points, and serve as a reference throughout the design process. Here is a more detailed explanation of how to create personas professionally for a UX designer:
Define the research plan: Before conducting any research, it's essential to define a research plan that outlines the objectives, methods, and schedule of the research. This will ensure that the research is conducted in a structured and professional manner.
Conduct user research: Gather information about the target users through various research methods such as surveys, interviews, focus groups, and observational studies. This information should include demographic data, behaviours, goals, pain points, and users' motivations.
Analyse the data: Once the research is completed, analyse the data to identify common user patterns and themes. This will help to identify different segments of users based on their characteristics and needs.
Create a persona template: Create a template for the personas that includes all the relevant information that needs to be included, such as demographics, behaviours, goals, pain points, and motivations.
Create personas: For each user segment identified, create a persona representing that group of users using the template as a guide. It is important to provide as much detail as possible, to make the persona as realistic as possible.
Validate the personas: The personas should be validated with real users to ensure they are accurate and represent the target users.
Use the personas: Once they are created, use them as a reference throughout the design process. They will help the design team to keep the users in mind and to make design decisions that align with the users' needs and goals.
Journey map:
A user journey map is a visual representation of a user's steps to complete a specific task or achieve a particular goal. It helps to understand the user's experience and identify pain points and opportunities for improvement. Here is a more detailed explanation of how to create a professional user journey map:
Define the scope: Before creating the user journey map, it's essential to define the scope of the map. This includes the task or goal that the user is trying to achieve, the users that the map represents and the specific touchpoints or interactions that will be included in the map.
Gather information: Gather information about the user's experience through various research methods such as surveys, interviews, and usability testing. This information should include the user's thoughts, feelings, and actions at each touchpoint.
Create a template: Create a template for the user journey map that includes all the relevant information that needs to be included, such as the user's thoughts, feelings, and actions at each touchpoint.
Create the user journey map: Use the template and the information gathered to create the user journey map. The map should include all the touchpoints or interactions that the user goes through to complete the task or goal and should represent the user's thoughts, feelings, and actions at each touchpoint.
Validate the map: The user journey map should be validated with real users to ensure it accurately represents their experience.
Use the map: Once the user journey map is created, it can be used as a reference throughout the design process. It helps to identify pain points and opportunities for improvement and can inform design decisions to improve the user experience.
In conclusion, creating a professional user journey map requires a well-defined scope, gathering information about the user's experience, creating a template, creating the map, validating the map with real users and using the map as a reference throughout the design process. This process allows us to understand the user's experience, identify pain points and opportunities for improvement and make design decisions that improve the user's experience.
UX design trend
Ux design trend

User experience (UX) design is an ever-evolving field, with new trends and technologies emerging regularly. In recent years, we have seen a shift towards more personalized and human-centred approaches to design, as well as an increased focus on accessibility and inclusive design.
One trend that has gained traction in recent years is micro-interactions. These are small, subtle animations and interactions that add a layer of delight and engagement to the user experience. Examples of micro-interactions include the pull-to-refresh gesture on a mobile app, or the "like" button on a social media platform. Microinteractions can help make interfaces feel more responsive and alive and provide visual cues that help users understand how to use a product or service.
Another trend that has gained popularity in recent years is the incorporation of conversational interfaces. With the rise of virtual assistants like Alexa and Google Home, we are seeing more and more products and services that use natural language processing (NLP) and machine learning (ML) to understand and respond to user input. Conversational interfaces can make it easier for users to interact with products and services and can also help to create a more personalized experience.

Virtual Reality (VR) and Augmented Reality (AR) technology are becoming more prevalent in UX design as well. These technologies allow designers to create immersive, interactive experiences that can be both fun and functional. For example, a furniture retailer could use AR to let customers visualize how a piece of furniture would look in their home before making a purchase. Similarly, a travel company could use VR to give customers a virtual destination tour before booking a trip. These experiences can be more engaging and helpful for the users.

Accessibility and inclusive design are also becoming increasingly important in UX design. This involves designing products and services that are usable by as many people as possible, including those with disabilities or other impairments. This can include things like designing interfaces that are easy to navigate using a keyboard or screen reader or providing alternative ways for users to interact with a product or service. This can be done by designing for different devices and contexts, like designing for mobile, designing for different languages and cultures, and designing for different ages and abilities.
In the future, we can expect even more advancements in technology and design that will continue to shape the field of UX design. For example, with the rise of 5G networks and the Internet of Things (IoT), we will likely see more connected devices and services that are capable of communicating with each other in real time. This will open up new possibilities for UX design and allow designers to create more seamless and integrated user experiences. Additionally, advances in artificial intelligence (AI) and machine learning (ML) will allow designers to create more personalized and adaptive user experiences.
In conclusion, user experience design is a dynamic field that is constantly evolving. As technology advances and our understanding of human behaviour deepens, the field of UX design will continue to evolve and change. By staying current with the latest trends, techniques, and technologies, designers will be able to create more engaging and effective products and services for users.